Star rendering settings in Uniview 3.0
Star rendering settings in Uniview 3.0
With the release of Uniview 3.0, we have made several improvements to how we render stars.
Since these changes result in it behaving differently to 2.0, following is a description of what has changed, why, and how you can adapt stars rendering to best suit your needs.
Star size in pixels is now directly dependent on the Dome resolution
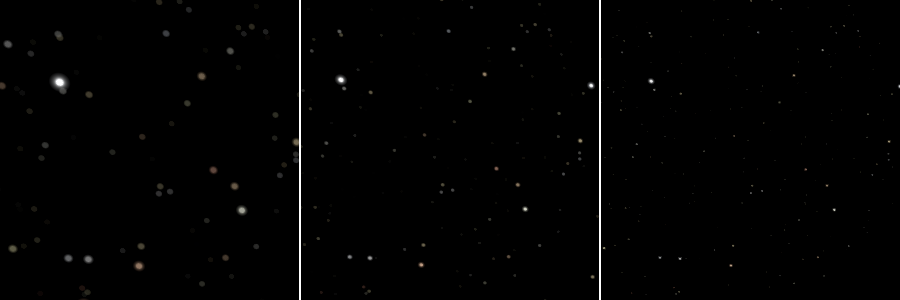
The greater the resolution of the dome, in effect producing a greater display pixel density, the more pixels will be used to render each star.
This resolution is defined in the file “systemconfiguration.xml”, located in the Uniview Theater 3. 0 System Settings folder.
The default value upon installation, is <resolution>4096</resolution> in that file, for a 4K dome. Note that a side effect of this value is global for the cluster, and thus affects the star size appearing on the GUI computer display. Most important is that the value is set for stars to have optimal display size on the main display, in case of a planetarium, the Dome. If you use 3.0 for video production on a standalone production computer using the Render Frame Sequence... dialog box, you have to specify the desired pixel size yourself in that dialog.

Three screen captures, from the left corner of the default view in the GUI just upon load, for resolutions 2048, 4096, and 8192 respectively.
The new Stars rendering shader in Uniview 3.0
 Uniview 3.0 Star Catalog Properties |
To the left, you see the Uniview 3.0 Property pane, for the Star Catalog object. You see several sections, one for ‘Points’, one for ‘Poly’, and one for ‘Star’. The first two each have fields named ‘Size’, which correspond to variables for ‘polysize’ and ‘psize’ respectively. New to 3.0 is the ‘Star’ section, which is also the one you see enabled, with the other two options being turned off. This new ‘Star’ section, contains the parameters controlling the star rendering in 3.0 for points data set. If you wish to see what the 2.0 stars looked like in 3.0, the option is still available to you - just enable ‘Points’ and ‘Poly’, and disable ‘Stars’. You may also find ‘Points’ and ‘Poly’ enabled for objects that you have loaded through a module made for Uniview 2.0, which depends on star rendering. In summary, the stars option is a different technique applied to the same data as before for a different look. The previous options are still there and are more tied to the partiview format and their parameters. To turn on or off the techniques by default in a module you can find these lines in say the stars.mod file in the default 3.0 stars module: eval stars on |
Служба підтримки клієнтів працює на UserEcho


Hi,
in Uniview 2 there was a 'save' button to set the current values as default.
I want to change the 'Brightness Curve', 'Glow Cutoff' and 'Glow Falloff' in the 'stars.mod' file, but i could not find the correct row.
I noticed that there are other options like
- see all stars within 100 light-years
- see all the naked-eye stars
- to see just the blue stars
- star motion in time
It would be very cool to have the features implemented in the gui.
Hi Thomas,
You can also save the current property values as defaults in 3.0. You just need to select the object you want to change int the object tree, set the values that you want, and click on the ... icon above the object tree.
If you do want to change these values in the stars.mod file (or any .mod file that uses star rendering) you can add the following lines to the .mod file (with the appropriate values):
We do support proper motion, and you can read more about that here: https://uniview.userecho.com/knowledge-bases/7/articles/163-how-do-i-get-proper-motion-to-work.