02 - Spice Kernels
In Getting Started, we talked about installing the modulesbuilder and its dependencies, and launching and running the spicekernels Jupyter notebook.
In this article, we will go through the contents of the spicekernels generator in order to get a sense of how the notebook is put together.
1st Code Cell

The first line of the first code cell tells the notebook that the textures and models should be in the data folder. The second line imports the relevant builtin libraries. The third line and the fourth line import uvmodlib, which is a library that was built to make creating these modules easier. We will discuss some of its features later on as they are used in the notebook.
2nd Code Cell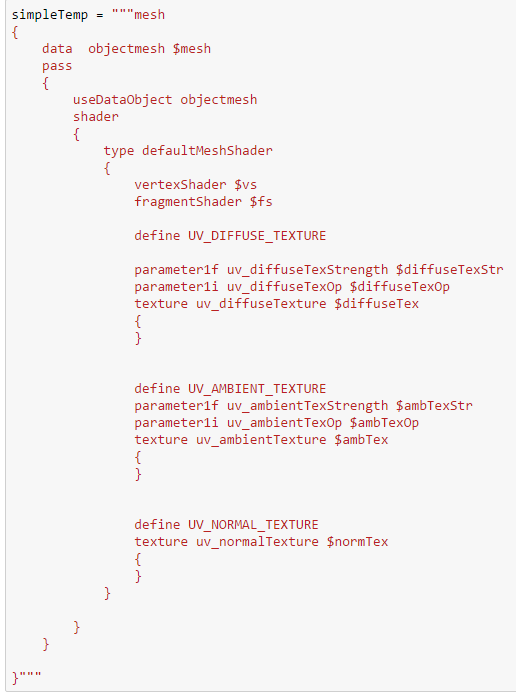
The second code cell contains a template to generate the module. The words prefaced by $, such as $mesh, are keywords that will get replaced with relevant text when the module is generated. For example $mesh will be replaced with the path to the model file when the module is generated.
3rd Code Cell
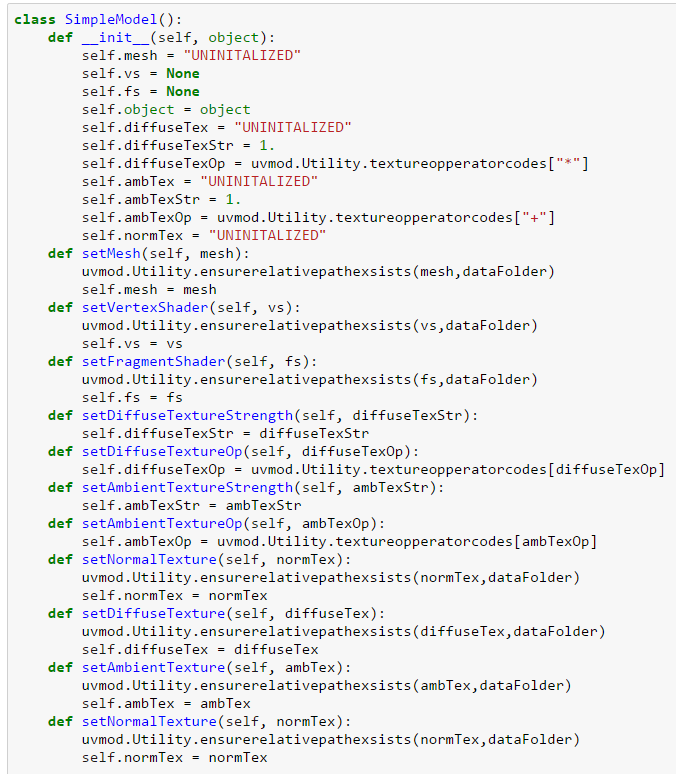
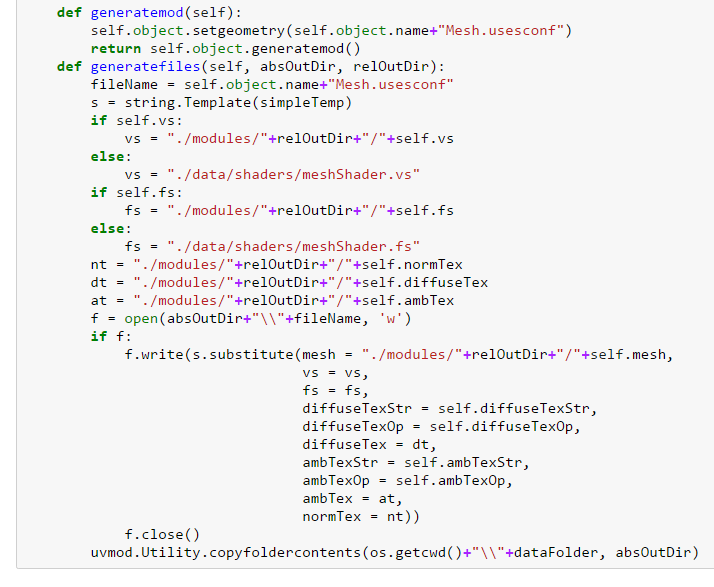
The third cell contains the class definition for the SimpleModel class. The initialization method (__init__) takes an OrbitalObject object from uvmodlib. OrbitalObject objects represent sgOrbitalObjects in Uniview. The function just initializes fields to appropriate default values or to the value "UNINITALIZED", which will appear in the configuration file if these values are not specified for the object before the module is generated. The next set of methods allow you to set values for the different fields if the object to change the properties of the object when it is generated. For file names, we can first make sure that the file exists in the data folder by using the ensurerelativepathexsists function.
The final two methods (generatemod and generatefiles) are the methods called by the generator to generate the module. Because of this, when creating or modifying similar classes, you should make sure that functions with those names and call signatures exist. generatemod is the function that generates the text in the .mod file for the module. Since we are working with an OrbitalObject, we first set the name of the geometry configuration file before calling the generatemod function that is built in for OrbitalObjects in uvmodlib. For generatefiles, we first makes sure that we use the default shaders unless otherwise specified and that filepaths are formatted correctly. We then take the template that was created in cell 2, replace the keywords with the values stored in the fields of the object and write the result of that substitution as the geometry configuration file. Finally we copy all the files and folders in the data folder to the folder for the newly generated custom module.
4th Code Cell
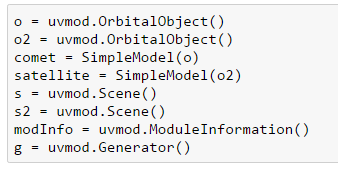
The fourth code cell creates all of the relevant python objects. Since we are creating two different objects in two different scenes, we create two OrbitalObject objects and two SimpleModel objects. We also create two different Scene objects. A Scene object allows you to generate a Uniview scene with the specified properties. We also create a ModuleInformation and a Generator object. The ModuleInformation object allows us to give the module a name, a description, and other properties that you can see in the profile editor. We call the generate method of the Generator to actually generate the module.
5th Code Cell

In the fifth code cell, we set up the scenes for the module. We set their name, parent scene, nit/scale, translation/rotation relative to parent scene, and the entrydist. We can also set it up so that the scene references an external file that could be a spice kernel, or a kepler file that contains orbital elements. For the first scene, we are using a spice kernel and have to specify the NAIF id number of the object, the frame of reference, the orbital observer, a scale parameter, and the spice kernel file. For the second scene we are using a kepler file and just have to specify the file with the orbital elements and an optional scale (which defaults to 1).
6th Code Cell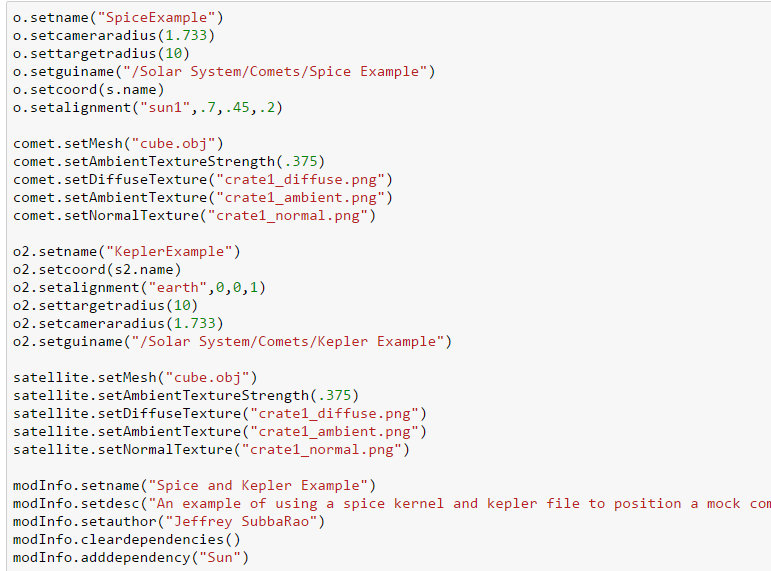
The sixth code cell is where we set the properties of all the objects. You can set the name, camera radius, target radius, gui name, and alignment through the OrbitalObject. Through the SimpleModel object, you can set the mesh file, the texture files and the texture strengths. To do this we use many of the methods defined in cell 3. Finally, through the ModuleInformation object, you can set the module's name, description, author, and dependencies as shown here. Additionally you can use the ModuleInformation object to add a screenshot, version number, or notes on operation. These will all appear in the description.html file if the ModuleInformation object is passed to the Generator object.
7th Code Cell
In the final code cell, we generate the module by running the generate method. We give the generate method the name of the file we want the custom module to be generated into, a list of the scene objects we want to generate (or an empty list if no scenes should be generated with the custom model), a list of the the objects that we want generated with the custom module, and an optional ModuleInformation object. This is when the generatemod and generatefiles methods are actually run. Finally we send Uniview the commands to reload both objects and to reload all the shaders. This is useful for faster prototyping. However changes to the information the mod file will only take effect if Uniview is restarted.
Customer support service by UserEcho

